Olly Auto Commenter Configuration Guide
Learn how to configure the Auto Commenter feature for LinkedIn automation to save time and increase your social media presence.
Keywords: Olly configuration, Auto Commenter, LinkedIn automation, Chrome extension, social media engagement, auto comment

Introduction
This guide will walk you through configuring the Olly Auto Commenter feature for LinkedIn automation. The Auto Commenter allows you to automatically engage with LinkedIn content while you browse the web, saving you time and increasing your social media presence.
Prefer video instructions? Watch our video guide to Auto Commenter setup (opens in new window)
Quick Links
Installation
Mac Installation Guide
Before configuring, make sure to install the Olly application on macOS.
→ Go to Mac Installation Guide
Configuration
Auto Commenter Setup
Learn how to configure the Auto Commenter for LinkedIn engagement.
→ Go to Configuration Guide
Support
Help Center
Get assistance and troubleshooting tips for the Olly Auto Commenter.
→ Go to Help Center
Before You Begin
⚠️ Important
To use the Auto Commenter feature in the background while you browse, you must first install the full Olly application on your Mac. This allows Olly to run continuously and engage with supporting social media's platforms even when you're not actively on the social media site.
→ Follow our Mac Installation Guide here
If you've already installed the Olly app, you can proceed with configuring the Auto Commenter below.
Important Information Before Setup
1. LLM Provider Requirement
⚠️ Auto Commenter only supports the Olly API and does not work with any other LLM provider. This is because other LLM providers do not provide the necessary permissions to perform background activity required for automated engagement.
2. Platform Support
⚠️ Auto Commenter now supports 5 platforms:
- TikTok
Configuring Olly Auto Commenter
Step 1: Open Olly Extension
Click on the Olly icon in your Chrome extensions toolbar to open the extension popup.
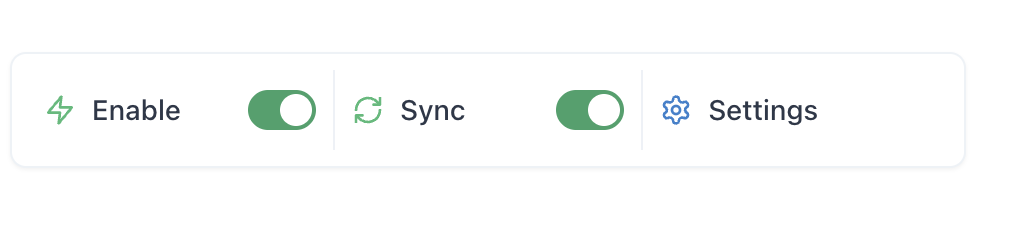
Step 2: Enable and Sync
In the Olly popup window:
- Toggle the "Enable" switch to ON
- Toggle the "Sync" switch to ON

Step 3: Access Settings
Click on the "Settings" gear icon on the right side of the popup.
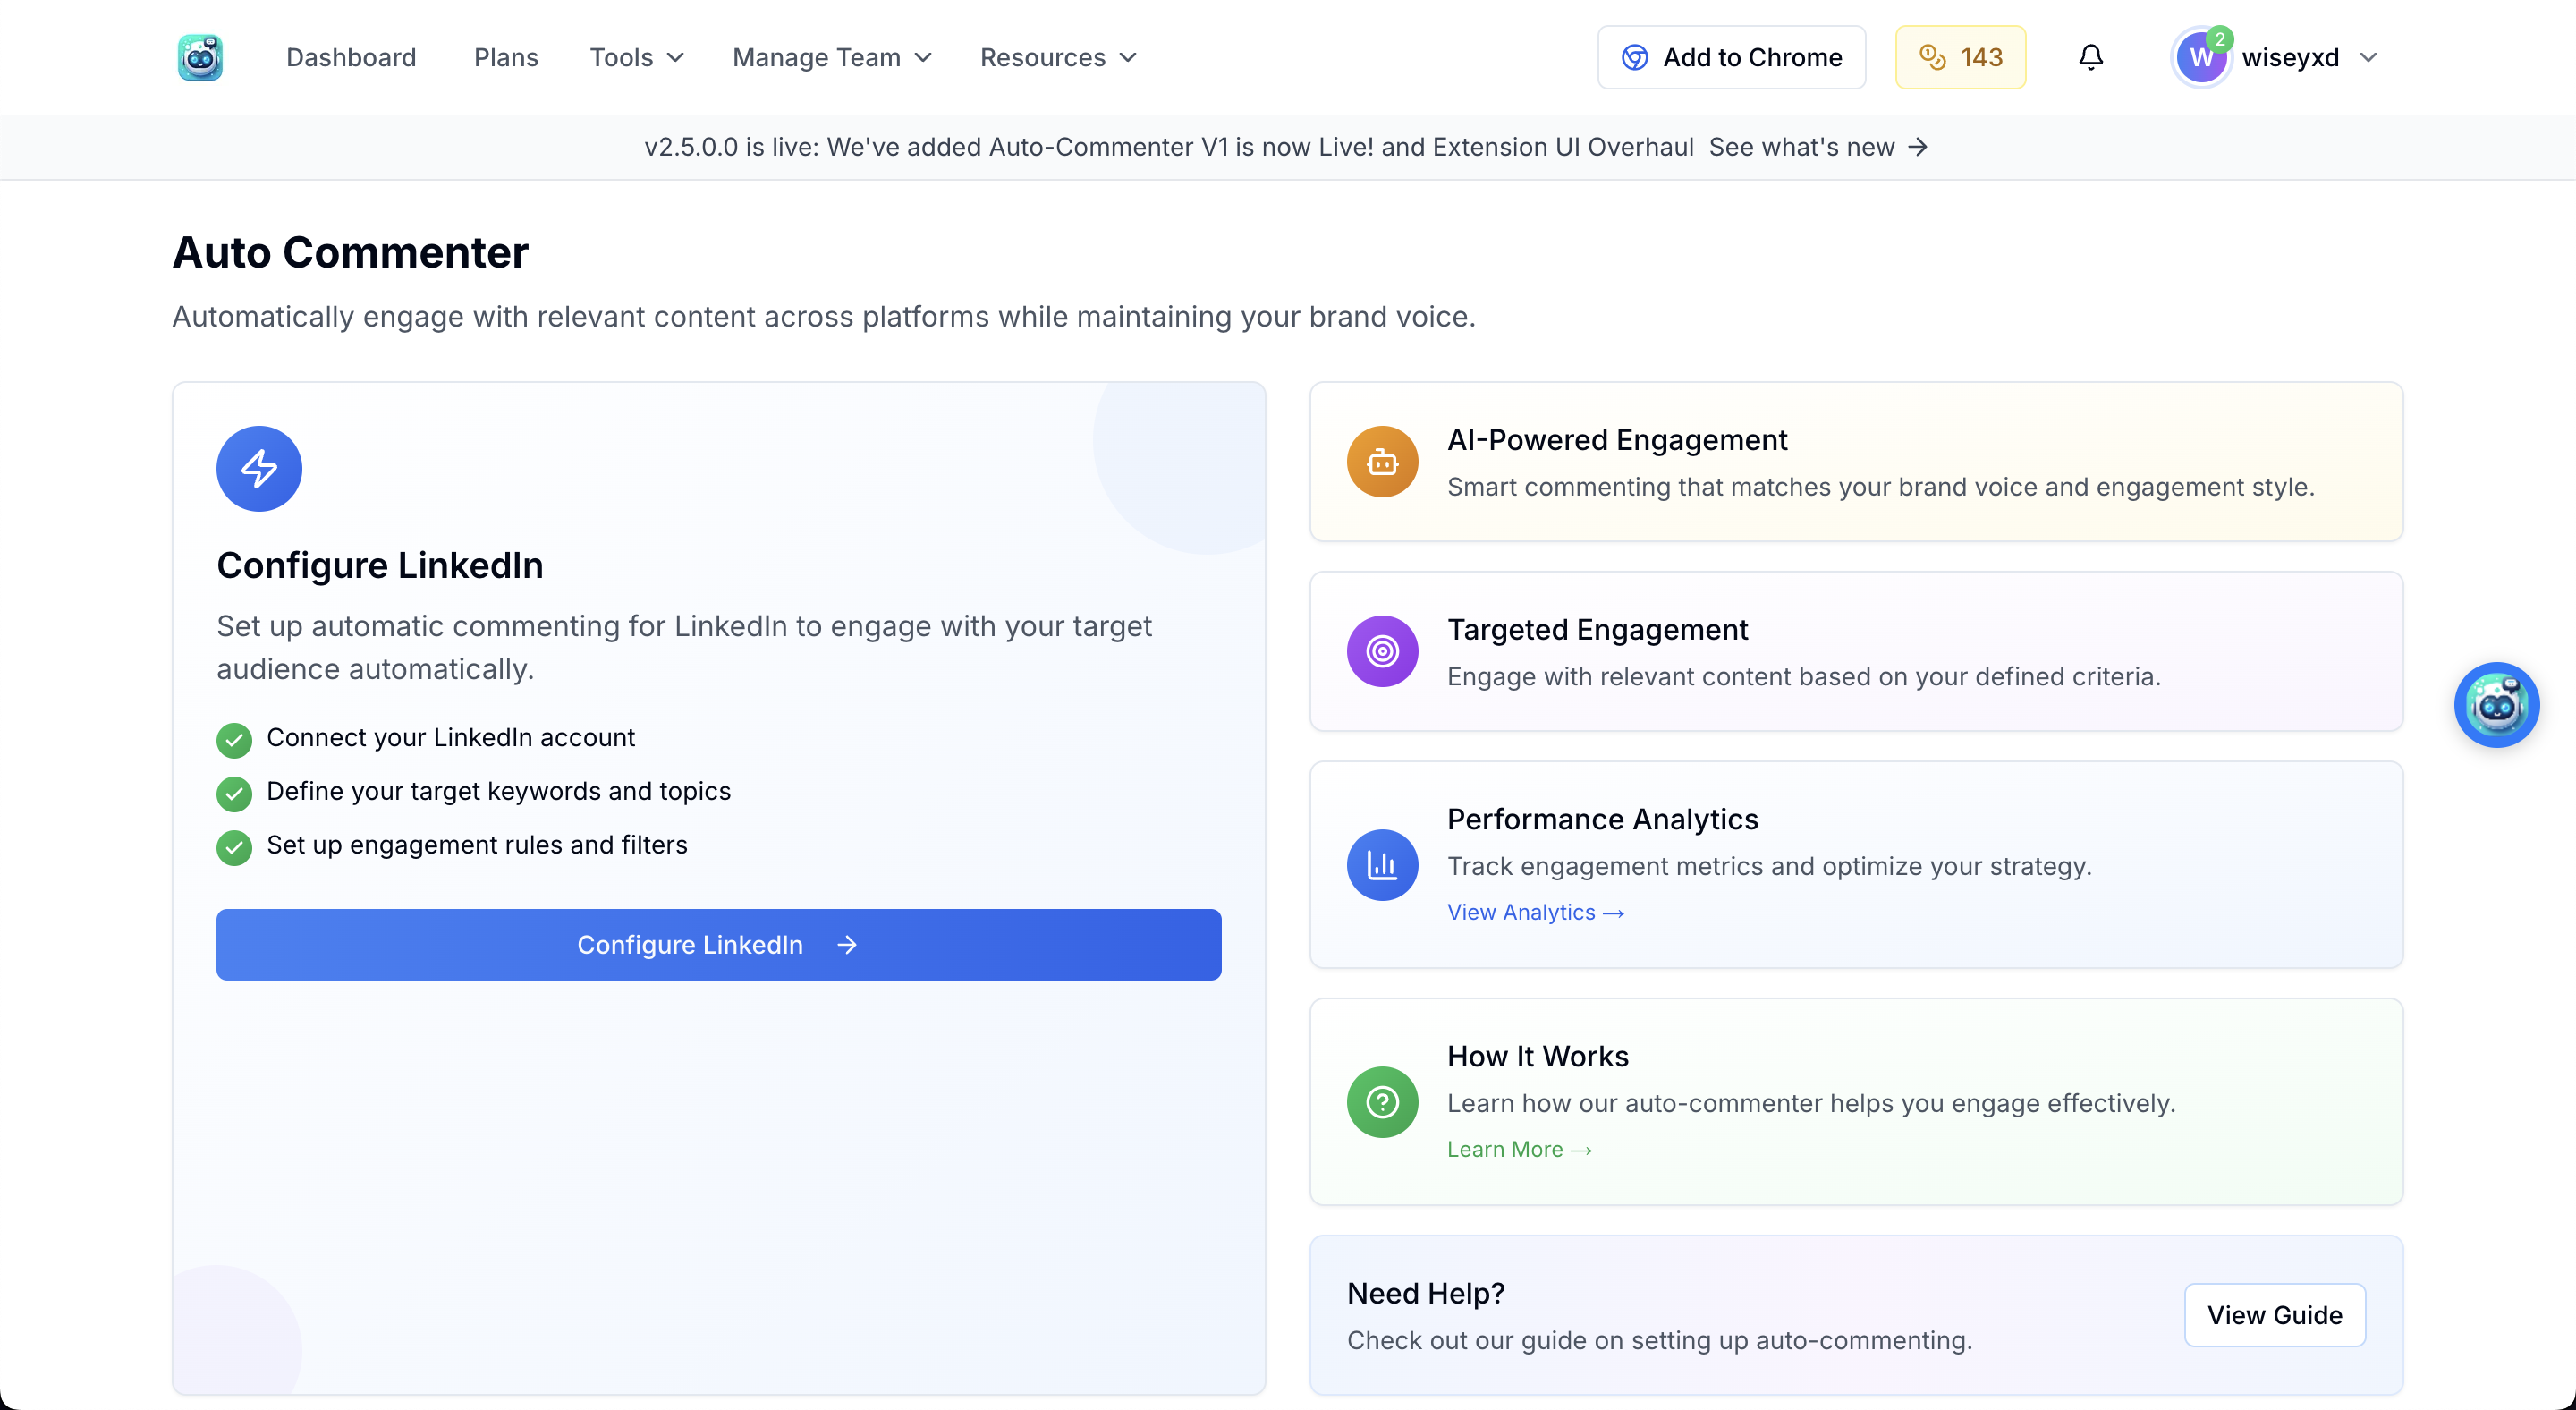
Step 4: Set Up Auto Commenter
- In the settings menu, find and click on the "Auto Commenter" option
- Click on "Setup Auto Commenter" button

Step 5: Configure LinkedIn Integration
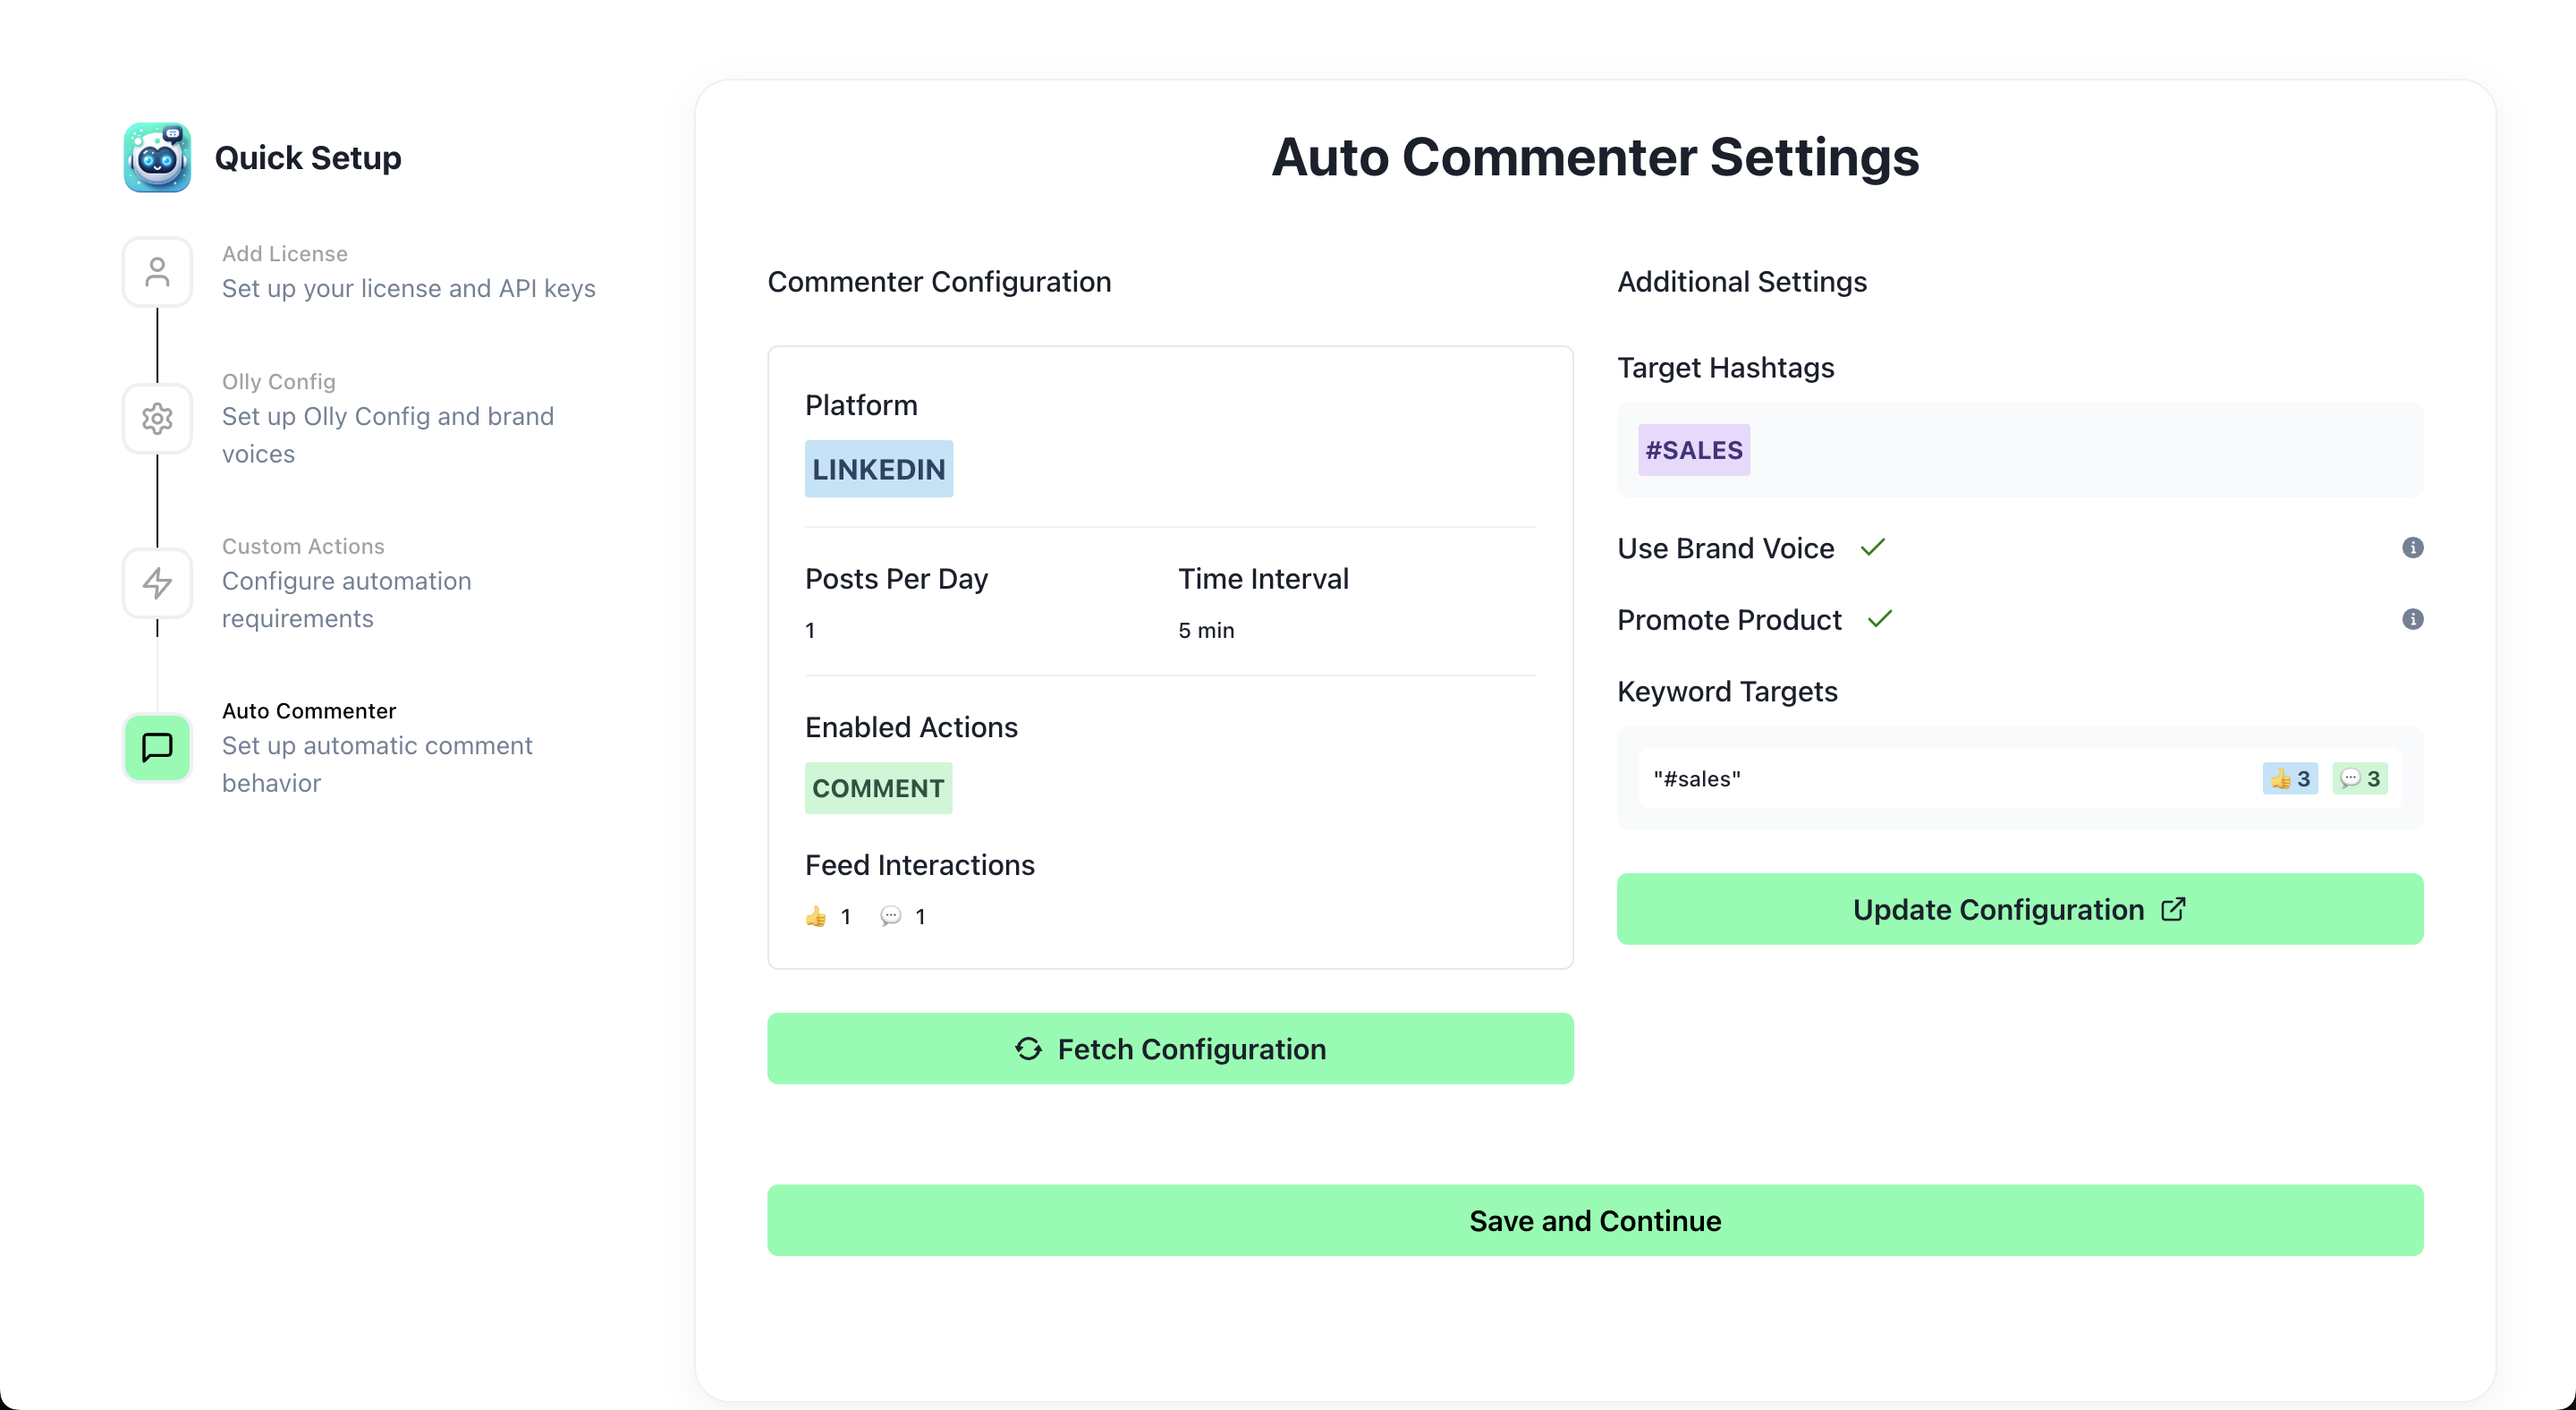
- You will be redirected to the Olly dashboard:
https://www.olly.social/dashboard/auto-commenter/config - Select platforms where you want to use Auto Commenter feature
- Review your License Key (should be automatically filled)
- You can copy the license key using the button if needed
- The system will confirm that this license is valid for the configuration
Additional Features Available:
-
Use Your Existing Brand Voice: You can now use your existing brand voice or you can create a new brand voice if you don't have the existing one in the Auto Commenter so that your responses will feel more human-generated and authentic to your personal or company style.
-
Promote Your Product: Include product promotion in automated interactions to naturally showcase what you offer while engaging with content.
- Product Details: Provide details about what you're promoting. This information will be used to generate relevant comments that seamlessly incorporate your product or service.
Step 6: Content Configuration
Set Engagement Limits:
⚠️ You can set a default maximum of 10 comments and 10 likes per run. Additionally, you can add up to 3 target keywords (3 hashtags) to focus your engagement.
Important - Balancing Comments Between Feed and Keywords:
⚠️ You need to distribute your 10 comments between the general feed and your target keywords.
Example:
- If you add 4 comments on the general feed and you are targeting 3 keywords, you have 6 comments remaining
- This means you can only add 2 comments per keyword (6 comments ÷ 3 keywords = 2 comments per keyword)
- You must adjust the 10 comment count between feed engagement and keyword targeting
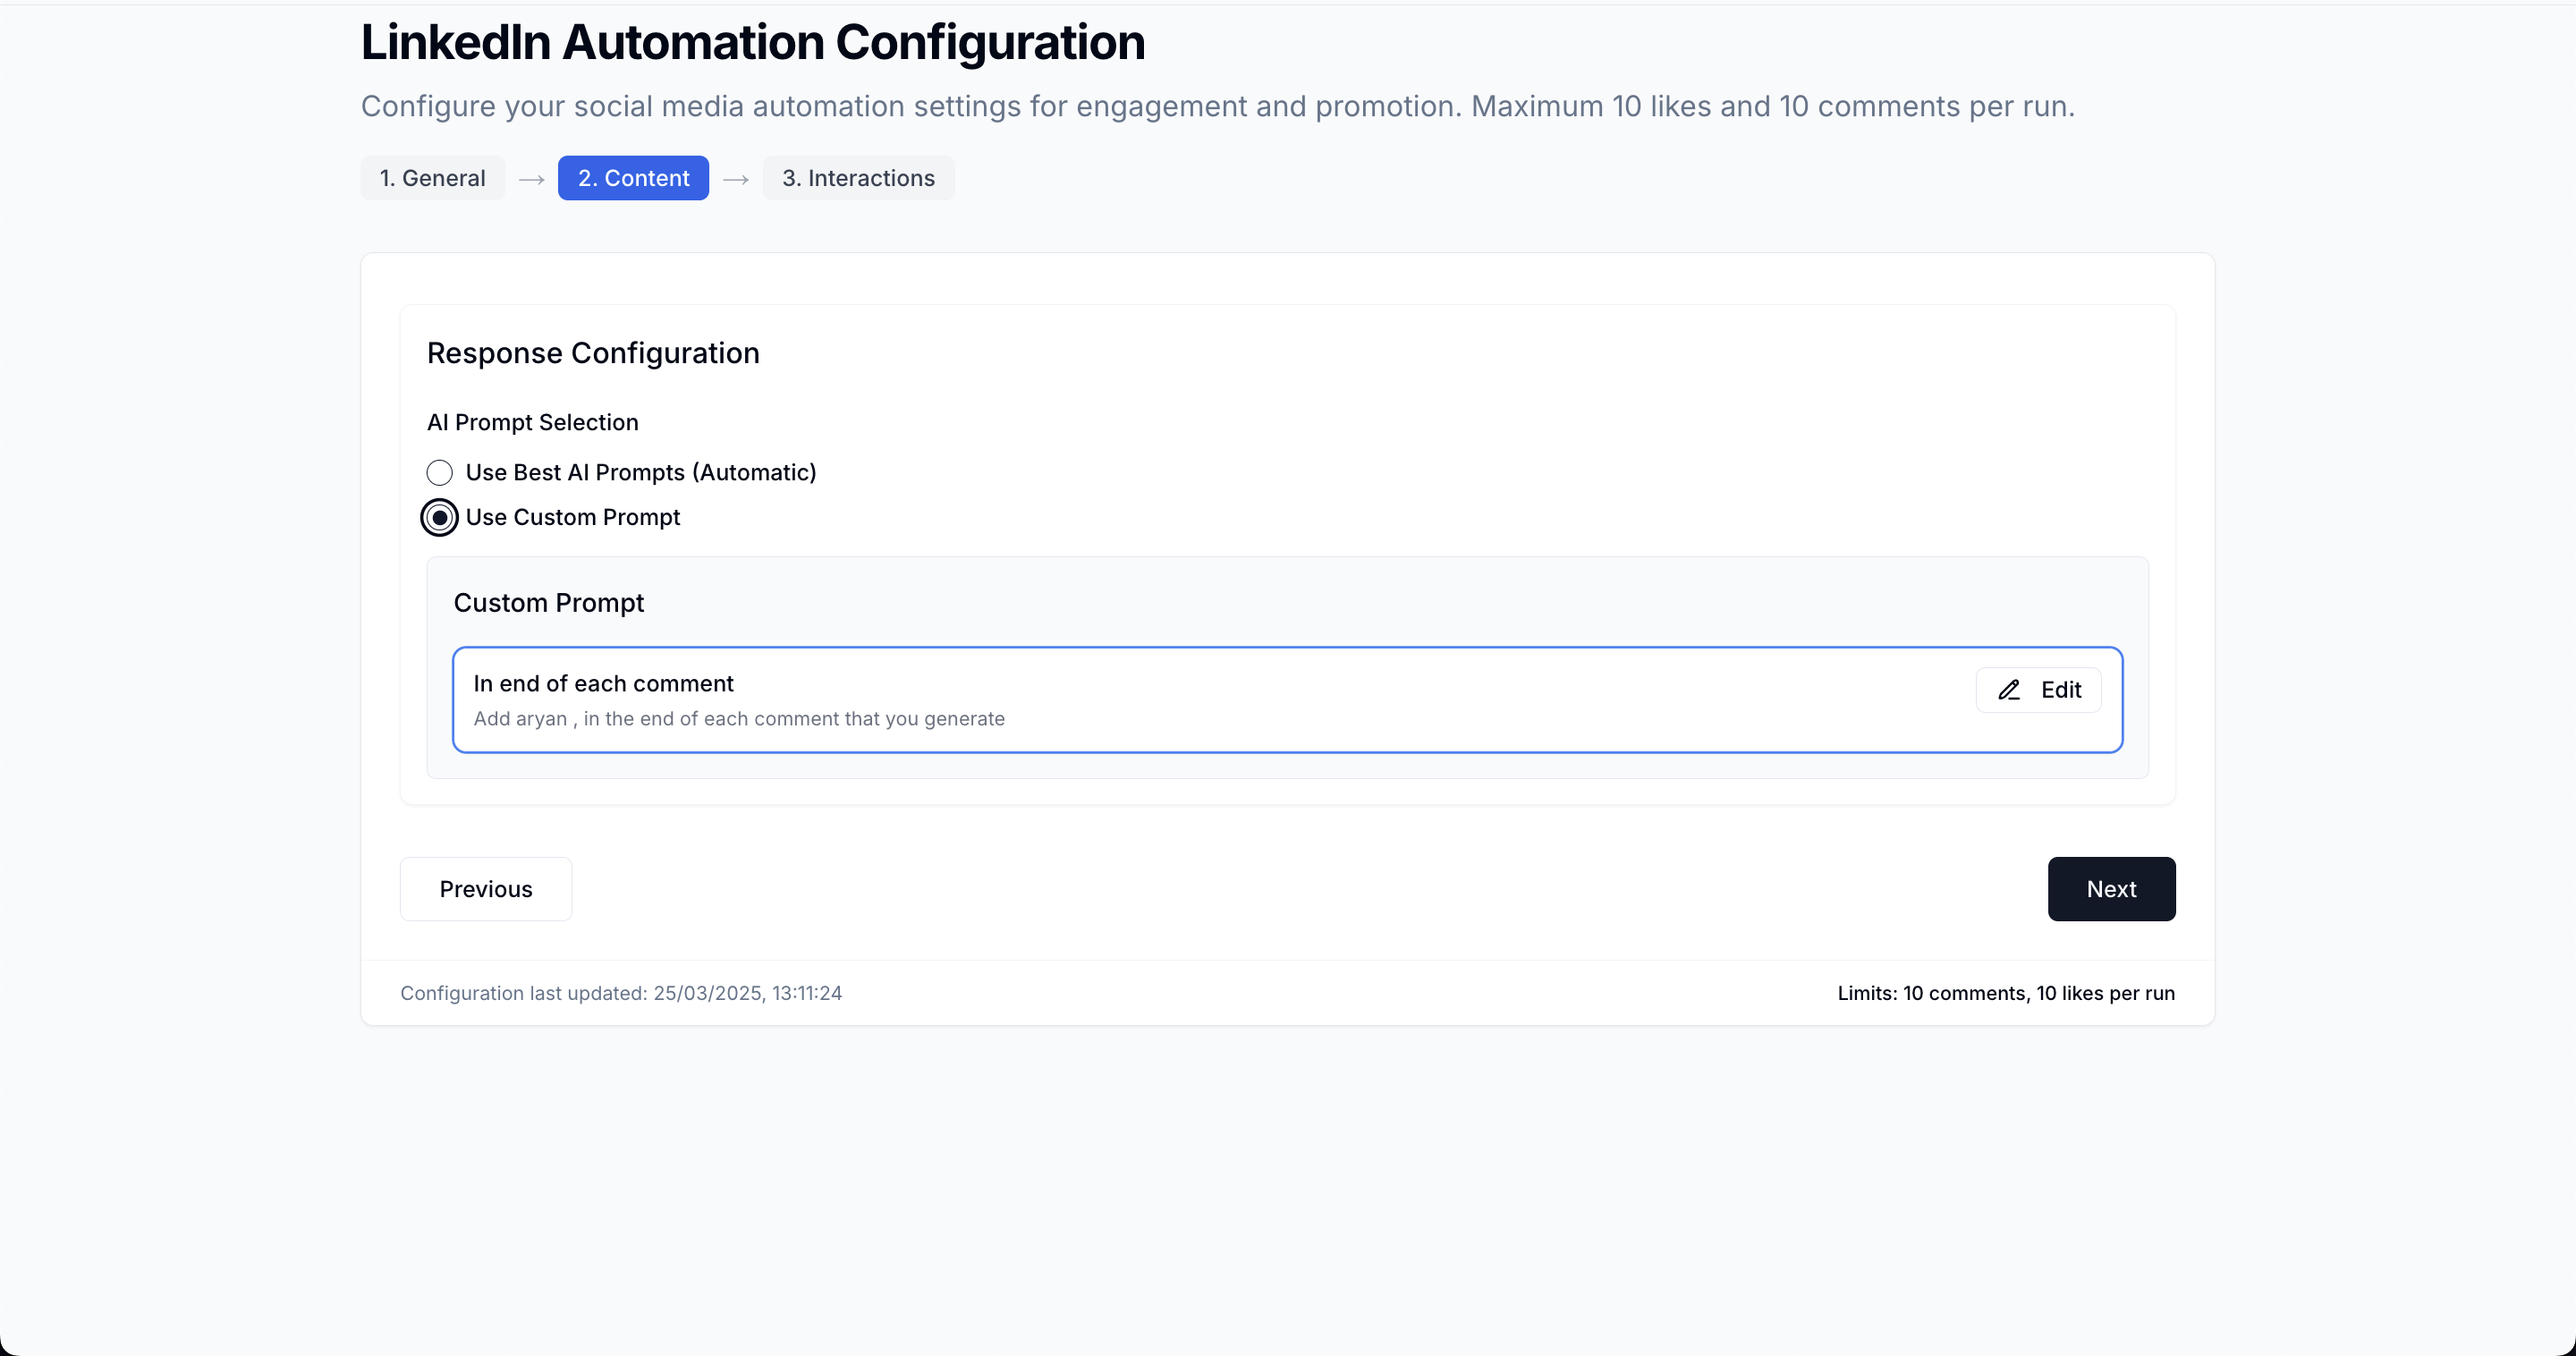
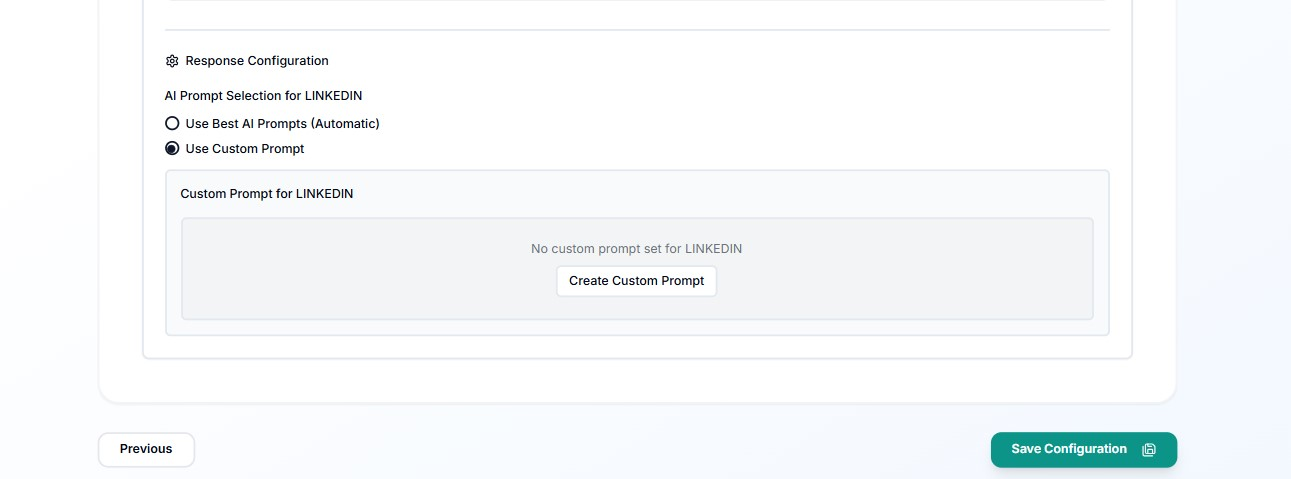
If you select "Use Custom Prompt", you can:
- Enter your custom instructions for comment generation
- Add signature text to appear at the end of each comment
Complete the Configuration:
- On the final page, click "Save Configuration"
Step 7: Sync Your Configuration
- Return to the Chrome extension
- Click on the "Sync" icon to pull your new configuration

Step 8: Verify Auto Commenter Settings
- Click on the "Settings" gear icon
- Check the "Auto Commenter" tab to confirm your configuration appears
Feature Benefits
- Time Saving: Automate engagement on LinkedIn posts while you browse the web
- Increased Visibility: Regular engagement helps boost your profile's visibility
- Consistent Presence: Maintain an active presence even when you're busy
- Smart Responses: AI-generated comments that are contextually relevant
- Customizable: Set your own engagement parameters and comment style
Who Will This Feature Help?
1. Social Media Managers
Easily manage LinkedIn engagement across multiple accounts while focusing on other important tasks
2. Marketers & Content Creators
Maintain consistent engagement without spending hours manually commenting on posts
3. Business Professionals
Build your personal brand on LinkedIn with minimal time investment
4. Job Seekers
Increase your visibility within your professional network when looking for opportunities
Using Auto Commenter in Background Mode
Do You Want to Use Auto Commenter in the Background?
To use Olly Auto Commenter in the background (while you continue browsing other websites), you need to have the full Olly application installed on your Mac.
- If you haven't installed Olly yet: Follow our Mac Installation Guide first
- If you've already installed Olly: You can proceed to activate background mode below
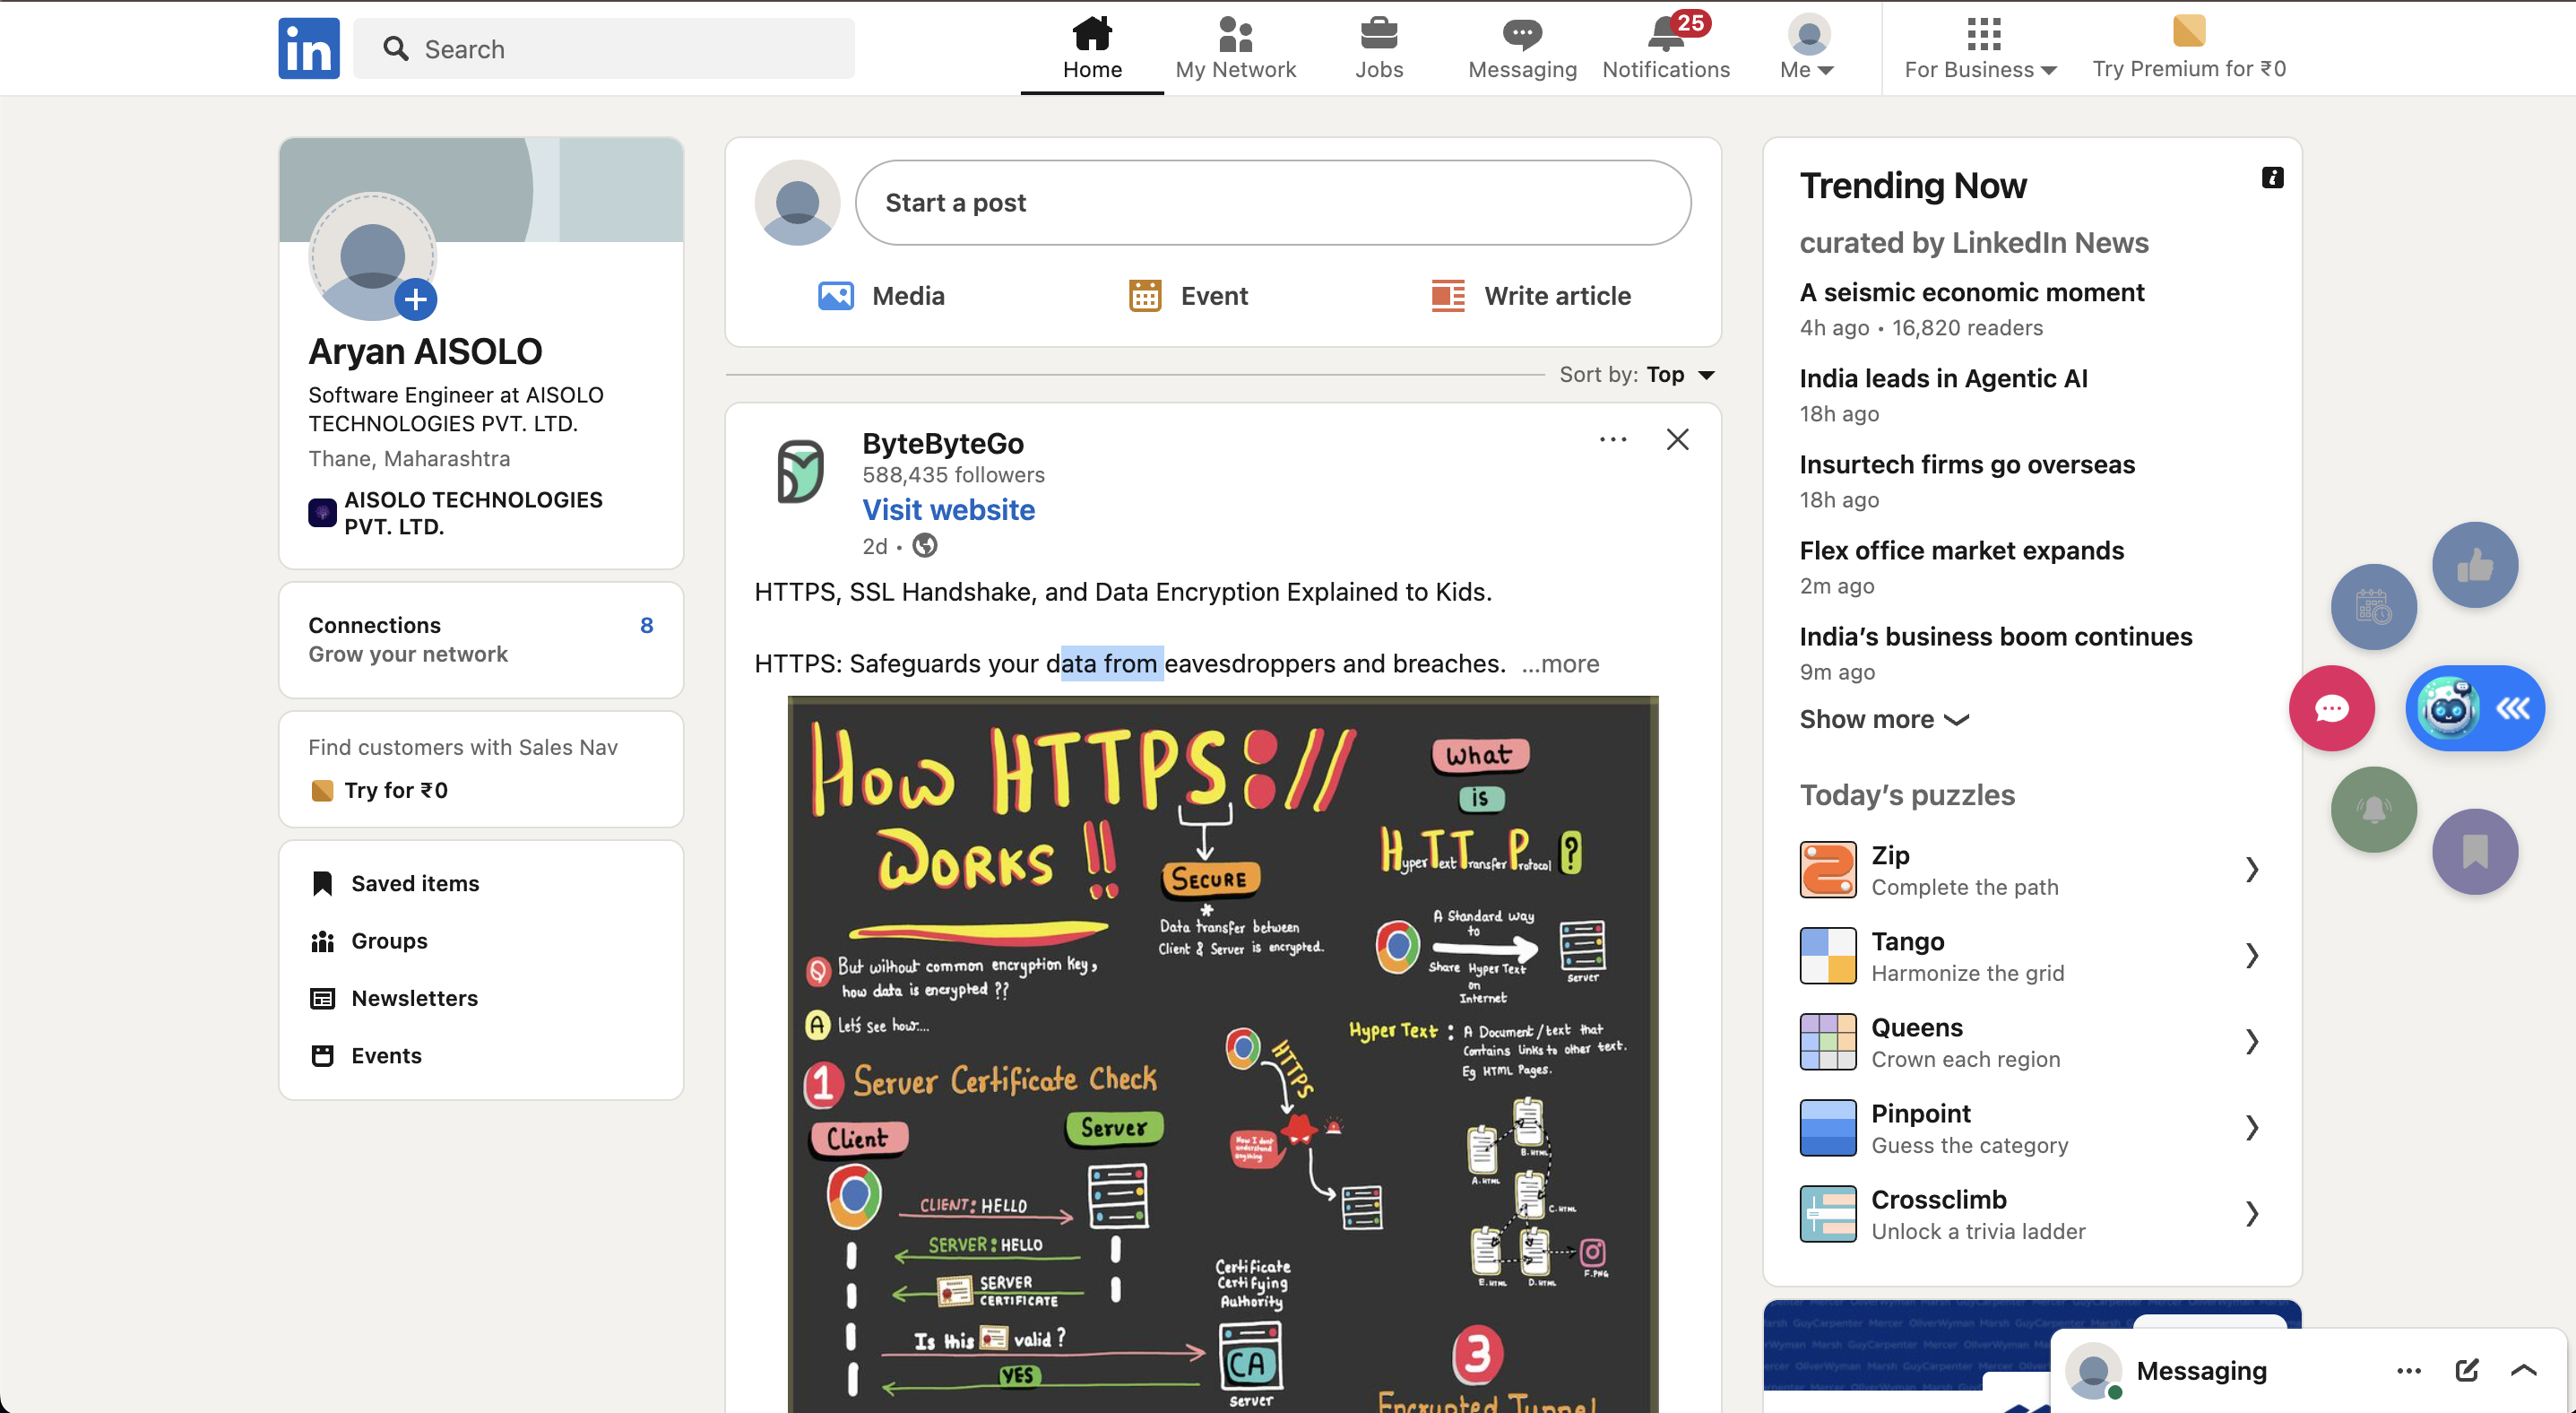
Activating Auto Commenter on LinkedIn
Step 9: Navigate to Social Media Platform Where You Want to Use Auto Commenter
- Navigate to Social Media in your browser
- The Olly popup icon should appear on the right side of your screen
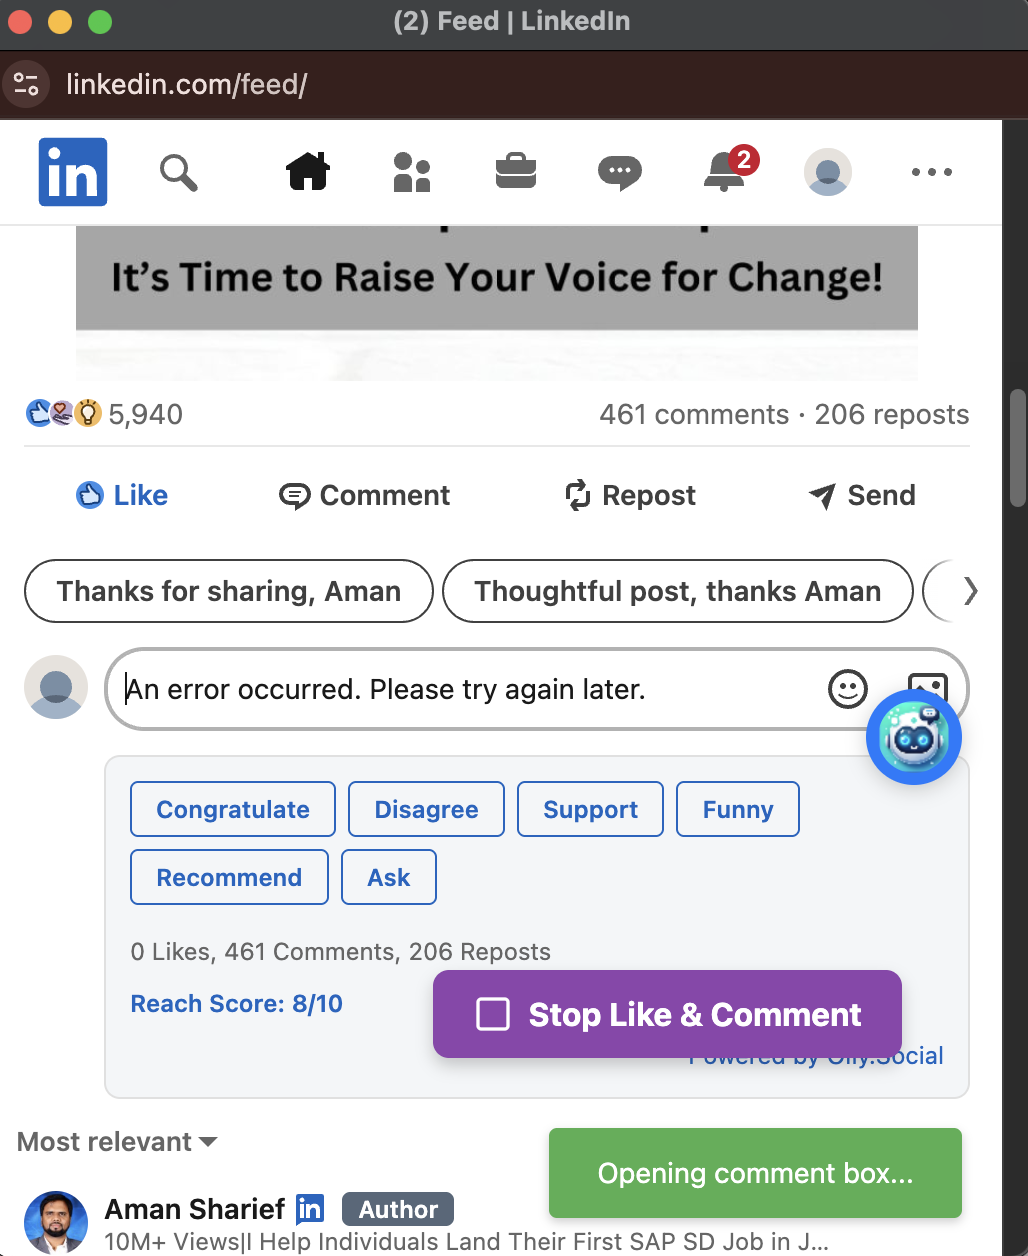
- Hover over it and click on the "Auto Engage" button
- A small window will open in the top right corner and will begin the auto commenting process
Step 10: Background Operation
- You can minimize the small window and continue browsing the web
- The Auto Commenter will engage on your behalf in the background
- You can click the "Stop auto comment" button at any time to halt the process
- When the process completes or is stopped, the window will automatically close
Troubleshooting
If you encounter any issues:
- Extension not appearing: Verify Chrome launched with the unthrottled parameters
- Configuration not syncing: Try toggling the Sync button off and on again
- Auto Commenter not starting: Ensure you're logged into LinkedIn and refresh the page
- Comments not posting: Check your daily limits and ensure your LinkedIn account is in good standing
- Background mode not working: Make sure the full Olly app is installed and running
For additional support or feature requests, please contact support at support@olly.social or visit our Help Center.